*Update*: See the updated presentation here!
If you're a regular reader, then you'll be expecting a Saturday Synopsis, which I'll push to tomorrow. Sunday Synopsis still sounds okay, right?
Today I'm sharing a dessert which will be amazing for July 4th because it's cool, it's delicious, and it's red, white, and blue. Also, I'll give a few tips for using an ice cream maker, so you can avert the many disasters that I encountered along the way!

In all honesty, I initially wanted to make a red, white, and blue popsicle, until I saw a million fancy versions on the internet. Then, I switched it up to an idea of blueberry & strawberry cheesecake ice cream (a combo of my fave flavors), but I didn't want to have to eat the whole recipe myself!
Luckily, I remembered reading about making healthier ice cream with coconut milk, so I considered swirling in some strawberries & blueberries into the coconut base. That's not exactly what happened, but the finished version is so much better than my initial plans!
The texture is so creamy and delicious that you won't be able to tell that it's anything but completely decadent. My three test subjects agreed!
********************
It's super simple and you'll definitely enjoy the end results. Stay tuned for Monday's post using this same recipe for an even more festive presentation!
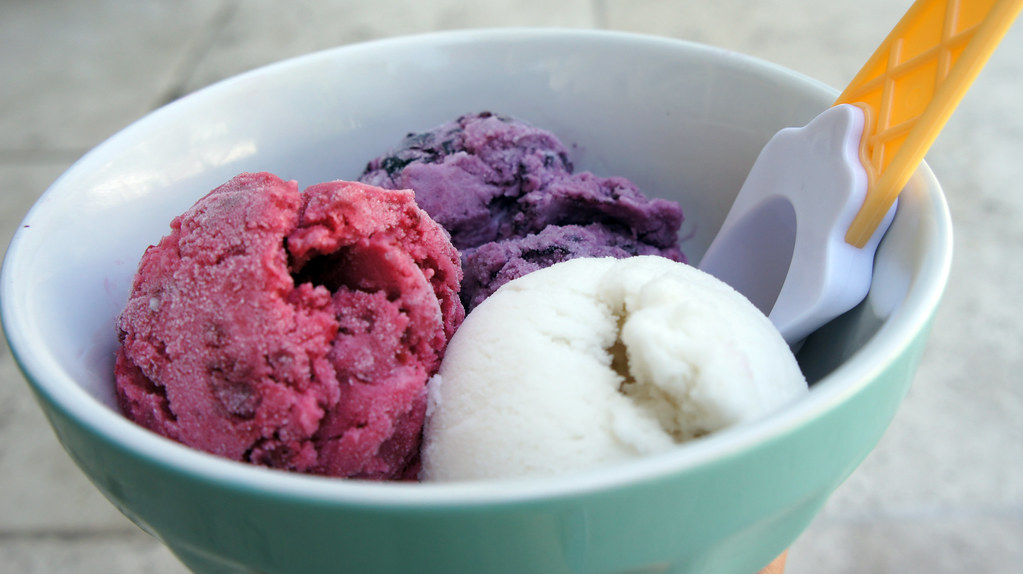
Coconut, Raspberry & Blueberry Ice Cream (AKA July 4th Ice Cream!)
Inspired by The Hungry Mouse

Ingredients
For coconut ice cream base:
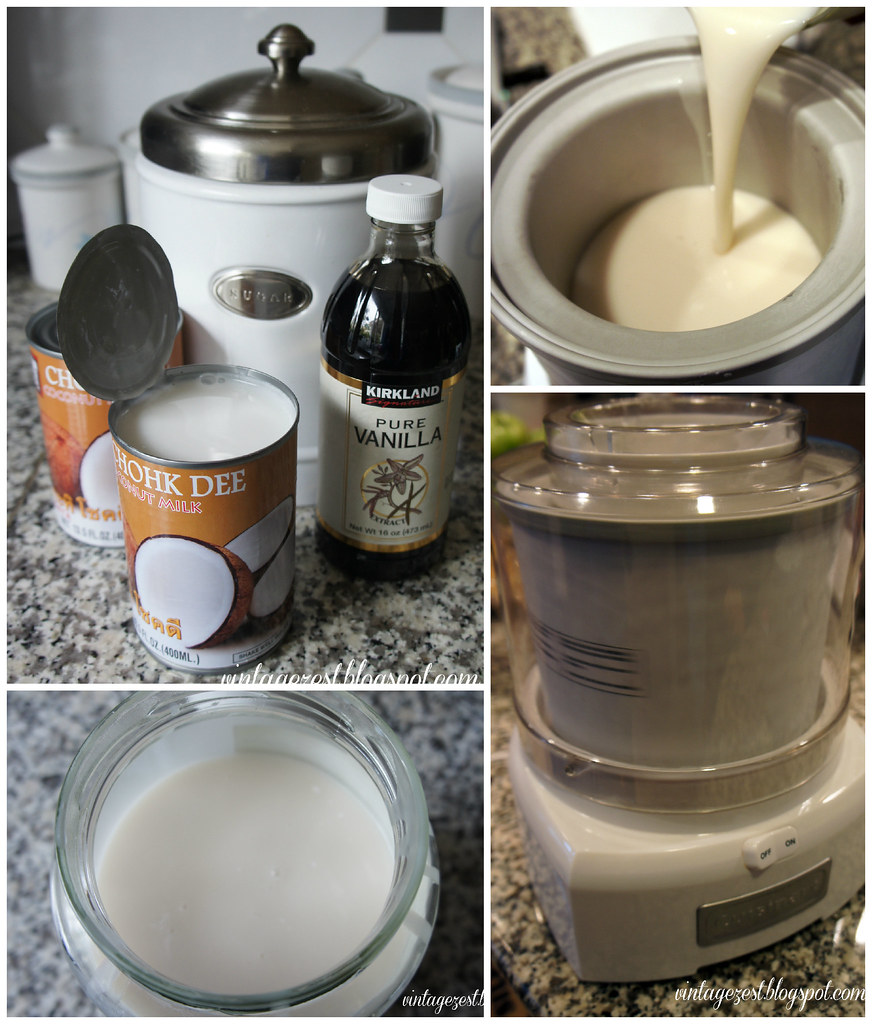
- 2 (13-oz.) cans of coconut milk
- 1 1/3 cups sugar
- 2 tsp. vanilla extract
For flavors:
- 1 cup raspberries, fresh or frozen (I used frozen, since I already had them on hand)
- 1 cup blueberries, fresh or frozen (I used frozen)
- 1/4 cup sugar, divided
- 2 - 4 Tbsp. water
Directions for Coconut Ice Cream Base
1. The night before you decide to make this, you may need to freeze your ice cream maker's drum, so make sure to read the instructions.
Note: I borrowed this from my sister, and 2 hours of freezing time was NOT enough. It turned out like cold coconut soup, so I cleaned out the drum, froze it, and ended up making the ice cream the next day!
2. The following day, mix all of the ingredients together in a freezer-safe receptacle. I used a mason jar! Taste the mix and add more sugar, if desired.
Note: If the ingredients are not cold, you may need to refrigerate or freeze them to get the ice crystals starting to form.
 |
| Don't copy me! I poured it directly into the machine... |
3. Pour the mixture into the fully assembled ice cream maker, unlike what I did. Luckily, I quickly inserted the churn before the crystals had a chance to accumulate!
Note: If you plan on making all three flavors, only pour in 1/3 of your mix.
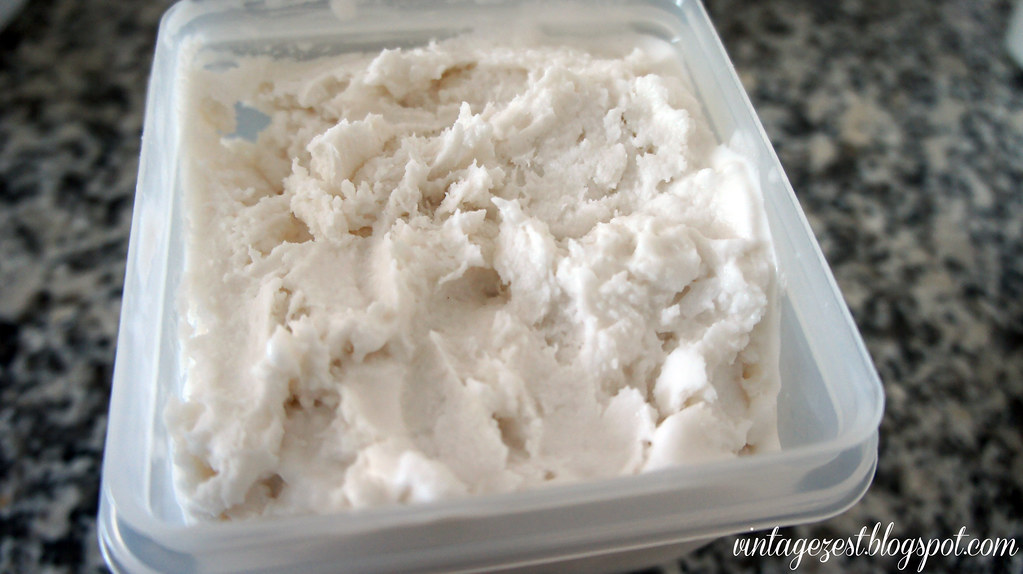
4. Transfer your lovely coconut ice cream into a freezer-safe container and try not to eat it all!
Directions for Flavors
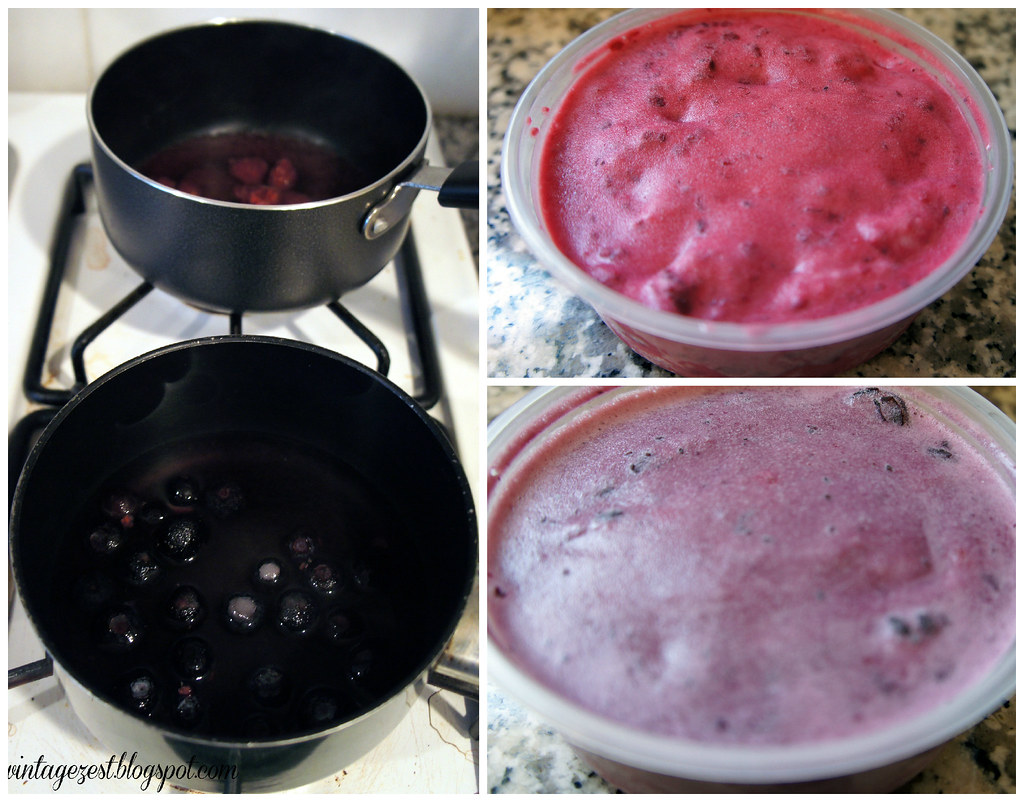
1. Over low-medium heat, combine your fruit, 2 tablespoons of sugar, and 2 tablespoons of water in a small saucepan. Cook until the fruit starts to soften, adding water as needed.
Note: Raspberries tend to cook quicker and fall apart faster than the blueberries.
2. Remove the fruit mixture and crush gently, leaving some intact if desired.
3. Let cool. Very important, or it will turn your ice cream into soup! All of the previous steps can be done the previous day, so it can cool overnight while your drum freezes.
For fully mixed colors (see below for swirled colors):
4. Add each flavor separately to 1/3 of the coconut milk mix, reserving 1/3 for the coconut (white) flavor.
5. You will need to work quickly in order to churn out three batches before the ice cream maker unfreezes. Using your ice cream maker as directed, first make the coconut (white) flavor.
6. Once finished, quickly scrape out as much of the coconut ice cream as possible. Repeat for the raspberry flavor, followed by the blueberry flavor. (That way, you have three nice bright colors without swirling!)
OR
For swirled colors:
4. Pour the base into the ice cream maker and let it run.
5. Five minutes before the ice cream is ready, slowly alternate pouring one half of each fruit mixture into ice cream maker to get the swirl effect.
6. Keep alternating until achieving the desired look.
Even though it looked beautiful, I was initially disappointed with my ice cream efforts because I really wanted that swirl effect. However, it ended up being a blessing in disguise, because each person had a different favorite and it was much easier to appreciate the different flavors when they were made separately. Score!
Later on, I tried out the swirl effect, and it really looks professionally made and pretty impressive! I will try to remember to post those pictures too.

The recipe is so easy, with only a few ingredients that I always have on hand. Yes, it is going to be really dangerous this summer during my battle of the bulge. :)
By the way, one serving tip that my guy suggested is to have the coconut ice cream with slices of fresh mango. Yep, he ended up eating the whole bowl above right after I was done photographing it and offered that awesome suggestion. He was right, it was amazing! It mimics the coconut sticky rice with mango that is often served after Thai food. Mmmm!
On Monday, I'll share my serving tip for making an even more festive July 4th ice cream. Until then...
Bon appétit!